
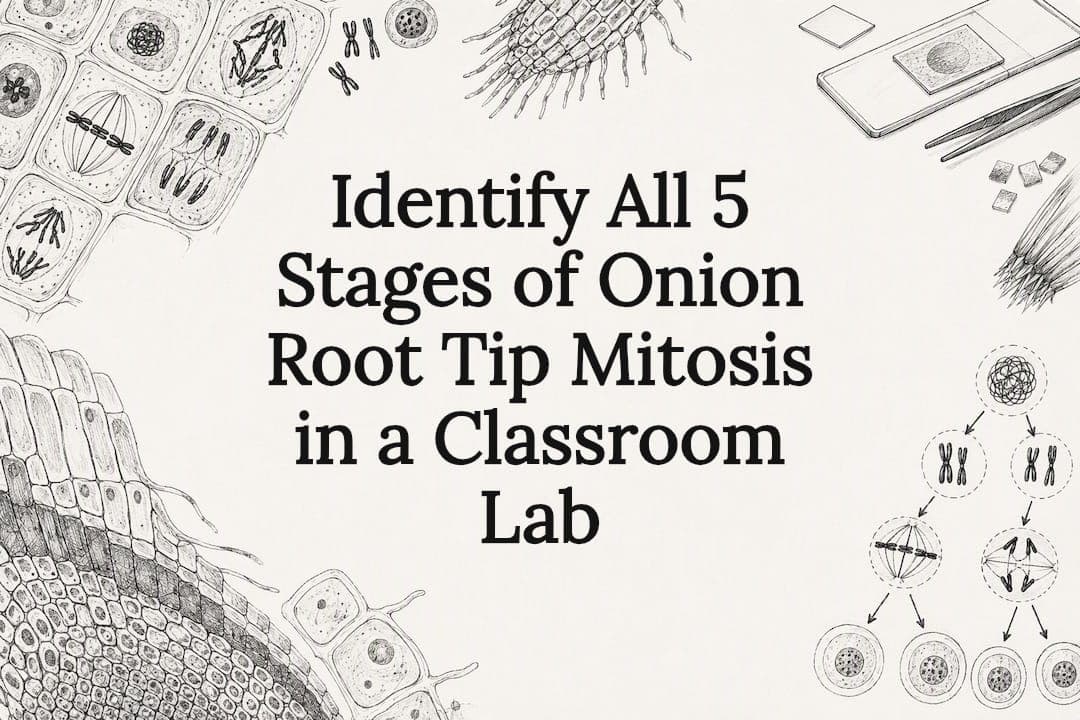
You can reliably find and identify mitotic stages in the onion root tip’s apical meristem with a simple fix, macerate, stain, and squash protocol paired with a compound microscope. The dividing cells cluster in the outermost 1 millimeter of the root tip, where the apical meristem sits. Once your slide is prepared, look for square, tightly packed cells with dense, visible chromosomes; the shape and position of those chromosomes tell you exactly which stage you’re viewing.
TL;DR:
Onion root tips contain all five mitotic stages within a small, accessible region, making them ideal for classroom observation.
Proper sample prep involves precise cutting, fixing, acid maceration, staining, and careful squashing to achieve clear chromosome visibility.
The mitotic index typically shows a majority of cells in interphase, with transitional stages like prophase and anaphase being less frequent but observable.
A stable compound microscope with at least 40x magnification and brightfield illumination is essential for distinguishing mitotic stages clearly.
Consistent timing, such as sprouting roots for 2 to 3 days and harvesting near midday, increases the chances of capturing actively dividing cells during the lab.
Table of Contents
-
Why onion root tips are the standard choice for classroom mitosis labs
-
Step-by-step protocol: harvest, fix, macerate, stain, and squash
-
A practical workflow for running a 45 to 90 minute mitosis lab
How to identify each stage of mitosis under the microscope
Once your slide is stained and squashed, the meristem zone will show a mix of resting and dividing cells side by side. This variety is what makes onion root tips useful for teaching: a single field of view can contain all five stages.
Start at low power (10x objective, 100x total magnification) to locate the meristem, recognizable by its small, boxy, tightly packed cells near the root cap. Then switch to the 40x objective for a clear look at chromosome structure and spindle detail.
-
Interphase: the cell looks like a typical plant cell with a large, oval nucleus and visible nucleolus; chromosomes are not distinct because the DNA is loosely packed as chromatin.
-
Prophase: the nucleolus disappears and chromatin condenses into visible thread-like chromosomes; the nuclear envelope is still present but beginning to break down.
-
Metaphase: chromosomes line up in a single row across the center of the cell, forming a clear plate; this is often the easiest stage to spot because the chromosomes appear as a tight, dark band.
-
Anaphase: sister chromatids separate and move toward opposite poles, giving the cell a distinctive “V” or double-cluster appearance.
-
Telophase and cytokinesis: two separate groups of chromosomes appear at each end of the cell, nuclear envelopes begin re-forming, and a cell plate starts to divide the cytoplasm into two daughter cells.
Interphase cells dominate most fields of view, which is expected since it’s the longest phase of the cell cycle. When you scan a slide, you’ll usually need to check several clusters before you find prophase or anaphase figures, since these transitional stages pass more quickly.
Chromosome appearance is your most reliable cue at every stage. During prophase, chromosomes look like tangled dark threads. By metaphase, they have condensed further and aligned with visible centromeres. Anaphase chromosomes look shorter and blockier as they separate, and by telophase they begin to decondense again, losing their sharp definition as the nuclear envelope reforms around each new set.
Spindle fibers are harder to see without special staining, but you can often infer their position from chromosome behavior. In metaphase, the chromosomes’ straight alignment implies the spindle is fully formed and attached at the centromeres. In anaphase, the outward movement toward each pole confirms the spindle fibers are actively pulling chromatids apart.
One practical note for students: cell walls in plant tissue do not disappear during division the way animal cell membranes pinch inward. Instead, watch for the cell plate, a faint line forming across the middle of a telophase cell. This is the first sign that cytokinesis is underway and will eventually become the new cell wall separating two daughter cells.
If you’re working with a mix of stained and unstained material on the same slide, focus your search on the darkest, most condensed clusters first. Overstained regions can mask stage detail, while properly stained meristem cells show a clean contrast between the chromosomes and the surrounding cytoplasm.
Why onion root tips are the standard choice for classroom mitosis labs
Onion (Allium cepa) root tips have become the default specimen for teaching mitosis for reasons that are both biological and practical.
-
High mitotic activity: the apical meristem is a small region of continuously dividing cells, so a single root tip slide can show every stage of mitosis in one view.
-
Large, countable chromosomes: onion cells have relatively large chromosomes compared to many other plants, making them easier to distinguish under a standard compound microscope.
-
Easy, reproducible sampling: onions sprout roots quickly in water, giving every student or lab group a fresh, consistent supply of tissue without specialized growing conditions.
-
Low cost and availability: onion bulbs are inexpensive and available year round, unlike many other plant or animal tissues used for mitotic studies.
For scheduling, sprout bulbs in water 2 to 5 days before the lab. Roots around 2 to 3 centimeters long typically have an actively dividing meristem near the tip. Harvesting around midday can improve your odds of catching cells mid-division, since mitotic activity in root meristems tends to follow a daily rhythm. If your lab period doesn’t align with midday sprouting, prepare backup slides in advance and store them in fixative.
Materials, hazards, and a pre-lab safety checklist
Before you begin, gather your reagents and equipment, and make sure students understand which steps require teacher supervision.
-
Fresh onion bulbs sprouted in water for 2 to 5 days.
-
Fixative solution (aceto-alcohol or ethanoic alcohol) for preserving cell structure.
-
Hydrochloric acid solution (commonly N/10 or 1N) for maceration.
-
Acetocarmine or aceto-orcein stain for chromosome visualization.
-
Microscope slides, coverslips, forceps, a razor blade or scalpel, and a dissecting needle.
-
Filter paper or paper towels for blotting and squash pressure.
-
A compound microscope with at least a 40x objective.
-
Gloves, safety goggles, and a well-ventilated area or fume hood for acid and stain handling.
Hydrochloric acid and acetocarmine stain are corrosive and can irritate skin, eyes, and respiratory passages. Students should wear gloves and goggles whenever handling these reagents, and the acid dilution and any heating steps should be performed by the instructor rather than students, especially in younger grades. Work in a ventilated space, and keep acid and stain containers labeled and capped when not in use.
Dispose of used acid and stain solutions according to your school or institution’s chemical waste guidelines rather than pouring them down a sink. If time, budget, or safety concerns make live preparation impractical, prepared commercial slides of onion root tip mitosis are a reasonable substitute for stage identification practice, though they won’t teach the preparation technique itself.
Step-by-step protocol: harvest, fix, macerate, stain, and squash
This protocol follows the standard classroom sequence used in most introductory biology labs, adapted from established root tip mitosis preparation methods.
-
Harvest: using a razor blade, cut only the apical 1 millimeter of the root tip, the whitish, slightly swollen region just behind the root cap. Cutting too far back grabs mature, non-dividing cells and will show little or no mitotic activity.
-
Fix: place the cut tips immediately into a fixative such as aceto-alcohol. Fixation halts cell processes and preserves chromosome structure; fixed tips can be stored for several months as backup material if kept properly sealed.
-
Macerate: transfer the fixed root tip into dilute hydrochloric acid (N/10 or 1N) for 10 to 15 minutes. The acid partially dissolves the pectin-rich middle lamella that cements plant cells together, which is what allows the tissue to spread into a single cell layer later.
-
Stain: rinse briefly, then place the tip in acetocarmine or aceto-orcein stain for several minutes. Gentle warming can intensify staining, but overheating will damage chromosome morphology, so warm briefly and check color development rather than leaving the slide over heat.
-
Squash: place the stained tip on a clean slide, add a coverslip, and press straight down with your thumb through a folded paper towel. Apply firm, even, vertical pressure only.
Pro Tip: Never twist or slide the coverslip during the squash step; twisting shears cells apart and destroys the very structures you’re trying to observe.
If your first squash looks clumped or uneven, don’t discard it right away. A gentle re-squash, pressing straight down again in the same spot, can spread the cells further without ruining the sample. If maceration was insufficient and cells remain clustered even after a second squash, it’s usually faster to start over with a fresh root tip than to keep working a poorly prepared one.

Expect some trial and error. Even experienced instructors get inconsistent results between slides, so having students prepare two or three squashes each, a few minutes apart, meaningfully improves the odds that at least one slide will show clean, well-spread cells.
Counting mitotic cells and calculating the mitotic index
Once you have a usable slide, scan at low power first to relocate the meristem zone, identifiable by its small, tightly packed, roughly square cells. Switch to the 40x objective once you’ve centered the meristem in your field of view, since this is where chromosome and stage detail become visible.
For a meaningful mitotic index, count a consistent number of cells across multiple fields rather than relying on a single cluster. A reasonable classroom target is 50 to 200 cells per slide, scanning 3 to 5 separate fields to reduce bias from any one crowded or sparse area. Importantly, treat every cell counted from a single onion as one sample rather than several independent ones. Comparing results across different onion bulbs, not just different fields on the same slide, is what gives you statistically meaningful replication rather than pseudoreplicated data from one plant.

The mitotic index (MI) is calculated as:
MI = (number of cells in mitosis) divided by (total number of cells counted), often expressed as a percentage.
| Stage | Example cell count | Percent of total counted |
|---|---|---|
| Interphase | 162 | 81% |
| Prophase | 20 | 10% |
| Metaphase | 8 | 4% |
| Anaphase | 6 | 3% |
| Telophase | 4 | 2% |
Staining and maceration quality both influence your counts. Understained or poorly macerated cells are harder to classify with confidence, which can artificially lower your recorded mitotic index simply because ambiguous cells get excluded or miscounted.
Common problems and how to fix them during preparation
Even a well-planned lab runs into snags. Most onion root tip issues trace back to one of a few repeatable causes.
-
Cells still clumped together: this usually means maceration was too short. Return the tip to fresh HCl for a few more minutes, or start with a new tip if the tissue has become fragile.
-
Slide is too dark to see chromosome detail: this points to overstaining. Rinse gently or dilute the stain, and shorten the soak time on your next attempt.
-
Chromosomes look faint or washed out: this is understaining. Extend the soak time slightly, and a brief, gentle warming can help the stain penetrate without damaging the tissue.
-
Cells appear torn or shredded: this happens when the coverslip is twisted during squashing instead of pressed straight down. Re-squash a fresh tip using vertical pressure only.
-
No dividing cells anywhere on the slide: check whether you cut too far from the root apex. Mature, elongated cells beyond the meristem zone won’t show division, so recut closer to the tip on your next tip.
Why microscope choice and setup support matter for this lab
A clean squash only pays off if your microscope can resolve what’s on it. For mitosis work, you want a compound microscope with a 40x objective at minimum, stable mechanical stage controls for fine positioning, and consistent brightfield illumination so stained chromosomes stand out clearly against the cytoplasm. Shaky focus knobs or dim lighting make it easy to mistake a blur for a stage you’re not actually seeing.
Wevision’s compound microscopes are built with these classroom needs in mind, pairing glass optics with mechanical stage control for the kind of stable, repeatable viewing that mitosis identification requires. Wevision also provides video demonstrations and setup guides that walk through focusing and slide handling step by step, which can shorten the learning curve for students new to compound microscopy and reduce the setup errors that often eat into lab time.
A practical workflow for running a 45 to 90 minute mitosis lab
Timing is the biggest constraint in a school lab period, so I stagger preparation in batches. While one group macerates their root tips, another can be fixing fresh ones, and a third can start staining. Keeping two or three pre-fixed backup tips on hand, stored from a prior day, rescues groups whose first squash doesn’t spread well.
Once slides are ready, I have students draw what they see at each stage, label the chromosomes and spindle region where visible, and calculate their own mitotic index from their counts. Comparing indices across groups, or even across bulbs sprouted for different lengths of time, opens the door to simple follow-up questions: does time of day or room temperature change how many dividing cells you find? Those questions turn a one-off observation lab into a small investigation students can design themselves.
Setting up your classroom for reliable mitosis observation
Getting clean squashes is only half the job. Seeing the difference between a tangled prophase cluster and a clean metaphase plate depends on the microscope doing its part too, with sharp optics, steady illumination, and a stage that holds still while you focus at 400x.

Wevision’s premium microscopes are designed for exactly this kind of classroom work, with glass optics and mechanical stage controls that keep a stained root tip slide in sharp focus at higher magnifications. Beyond the hardware, Wevision backs its microscopes with video demonstrations and setup guides that show you how to get from unboxing to a usable image quickly, along with responsive email support if you run into questions along the way. For educators planning a mitosis unit or setting up a permanent lab station, browsing the Wevision M1 binocular compound microscope is a solid starting point to see whether its features match what your classroom needs.
Sources
For instructors who want the exact reagent concentrations, timing tables, or safety notes behind this protocol, a few sources are worth keeping on hand. The Amrita Virtual Lab simulation walks through the fix, macerate, stain, and squash sequence in detail, including the chemistry behind maceration. The University of Vermont lab guide covers harvest technique and squash pressure with practical troubleshooting notes.
For classroom scheduling and backup-slide strategy, the Eduqas teacher guide on the mitosis practical offers timing guidance built specifically for school lab periods. Image-based identification support, including annotated slide photos, is available through the MinnState pressbook on onion root tip mitosis, which pairs well with live specimens for stage confirmation.
FAQ
How do you fix onion root tips for mitosis?
Cut the apical 1 millimeter of a fresh root tip and place it immediately into a fixative such as aceto-alcohol, which halts cellular activity and preserves chromosome structure for later staining. Properly fixed root tips can be stored for several months, making them a reliable backup for classroom labs.
What is the mitotic index of an onion root tip?
The mitotic index is the percentage of cells captured in any stage of division out of the total cells counted on a slide.
How do you stain onion root tips for mitosis?
After maceration in dilute hydrochloric acid, rinse the root tip briefly and soak it in acetocarmine or aceto-orcein stain for several minutes to color the chromosomes. A brief, gentle warming step can intensify staining, but overheating or oversoaking will muddy chromosome detail.
What happens if the tip of an onion root is cut off?
Cutting too far back from the actual apex removes the meristem and leaves only mature, elongated cells that are no longer dividing, so the slide won’t show mitosis. Always harvest the whitish, slightly swollen region within about 1 millimeter of the root cap to capture actively dividing tissue.