
Eyepiece reticle calibration means matching your reticle's divisions against a stage micrometer's known distances to produce one number: micrometers per reticle division. You get that number by aligning two coincidence points across the widest span your field of view allows, then dividing the known stage distance by the reticle divisions between them. Do this for every objective, on every microscope, and write the results down.
TL;DR:
- Calibration should be performed for each objective and reticle combination, as the calibration factor varies with magnification and optical setup.
- Using wider spans between coincidence points reduces fractional errors, making your measurements more accurate and reliable.
- Regular recalibration is essential after changing objectives, eyepieces, or cleaning the optics, to prevent measurement shifts caused by mechanical or optical inconsistencies.
- Keep detailed records of calibration factors linked to specific objectives and equipment to ensure accurate measurements over time.
- Stable hardware, proper alignment, and consistent illumination significantly improve calibration repeatability and precision in microscopy work.
Table of Contents
- What You Need Before You Start Calibrating
- Step-by-Step Calibration Procedure
- How to Calculate the Calibration Factor
- Why Do My Measurements Keep Coming Out Different?
- Recording and Applying Your Calibration Values
- Wevision Resources for Accurate Reticle Measurement
- Why Routine Calibration Is Worth the Bench Time
- Wevision: A Steadier Starting Point for Calibration
- Sources
- FAQ
What You Need Before You Start Calibrating
You need a stage micrometer, which is a glass slide etched with a ruled scale, usually in 10 µm or 100 µm divisions over a total span of 1 to 2 millimeters. Your eyepiece needs a reticle already installed, most commonly a linear scale with 100 divisions, though some reticles use crosshairs or grids. Confirm the division count printed on the reticle housing or in its manual before you start, since misreading a 50-division scale as 100 will throw off every measurement that follows.
Clean both the stage micrometer and the eyepiece lens with a lens-safe cloth. Dust or a fingerprint on either surface can look like an extra scale line under magnification.
- Center the stage and start at your lowest-power objective before moving up.
- Get a coarse focus on the stage micrometer's ruled lines first, then fine-tune.
- Have a notebook, spreadsheet, or shared lab log ready before you begin.
- Label the microscope and eyepiece you're working with, especially if your lab has more than one of each.
Step-by-Step Calibration Procedure
Work through this sequence at the same objective and eyepiece pairing you plan to use for actual specimen measurements. Skipping steps to save time is the most common reason calibration numbers don't hold up later.
- Insert the reticle and focus on it. You should see its scale sharply against a blank field before introducing the stage micrometer.
- Place the stage micrometer on the stage and bring it into focus. Start at the lowest magnification so you can locate the scale easily.
- Rotate the eyepiece or nudge the stage micrometer until the two scales run parallel. Any tilt between them introduces error before you've even taken a reading.
- Align one clear reticle line with a known stage micrometer line. This becomes your baseline coincidence point.
- Without touching the stage, scan across the field for a second exact coincidence, as far from the first as the field of view allows. A wider span dilutes the effect of any small misalignment at either endpoint.
- Count the stage micrometer distance (in µm) between the two matched stage lines. Then count the number of reticle divisions between the two matched reticle lines.
- Calculate the calibration factor using the formula in the next section, and log it immediately under the objective magnification, eyepiece and reticle ID, date, and your name.
- Repeat the entire process for each objective on the microscope, since a 40x objective and a 10x objective will yield completely different factors.
Once you find your first coincidence, avoid nudging the stage micrometer slide again until you've located the second one. Moving it resets your reference point and forces you to start over. Keep your hands off the eyepiece too. If it rotates even slightly mid-measurement, your "parallel" scales are no longer parallel.
Pro Tip: If you can't find a clean second coincidence within the field of view at your target magnification, drop to the next lower power just for calibration, then note that the factor still applies at the higher power. The optical relationship between reticle and stage doesn't change with your search strategy, only your ability to see the lines clearly.
How to Calculate the Calibration Factor
The formula is simple:
µm per reticle division = stage micrometer distance (µm) ÷ number of reticle divisions between coincidences
Here's a worked example. Suppose you find your first coincidence at the zero line, and your second exact coincidence at the 100 µm mark on the stage micrometer. Counting reticle divisions between those two points, you land on 7.5 divisions. Divide 100 by 7.5 and you get 13.3 µm per division, matching the example used in Nikon's MicroscopyU tutorial on reticle calibration.
- A 100 µm span split across 7.5 divisions gives 13.3 µm/division.
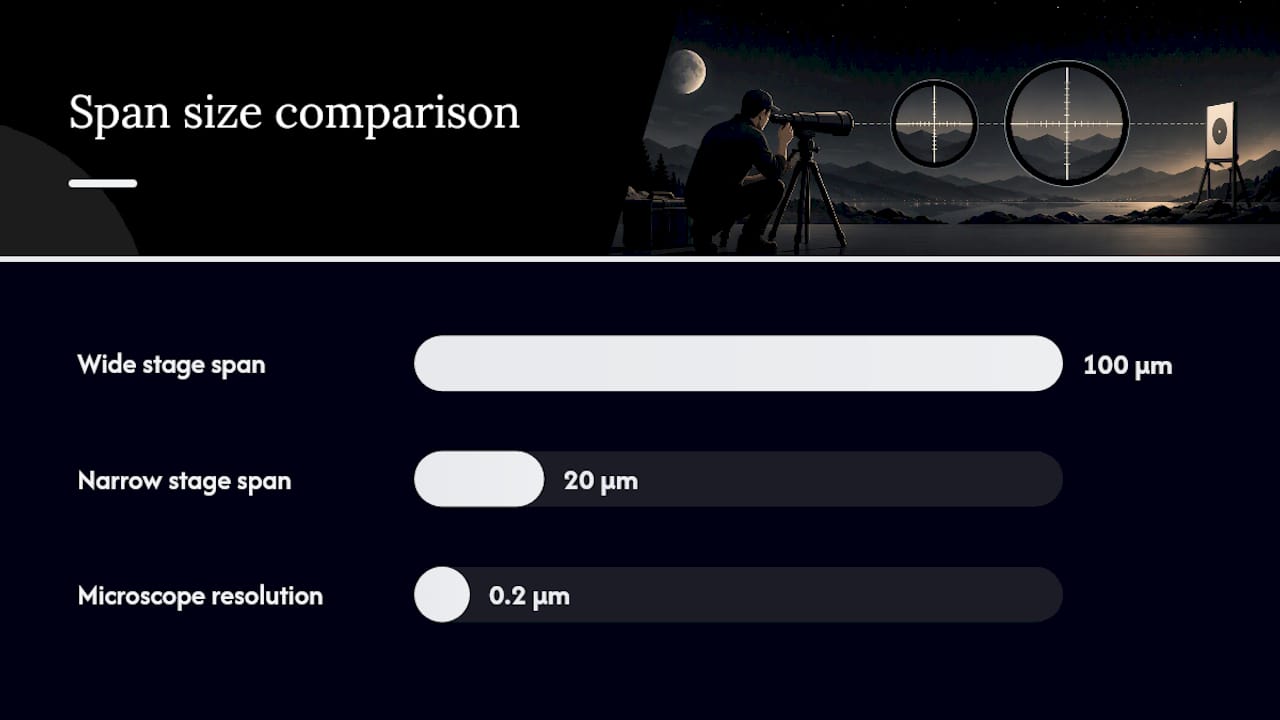
- The same reticle read against a narrower 20 µm span, with only 1.5 divisions matched, gives 13.3 µm/division too in theory, but any single-line alignment error now represents a much larger fraction of your total measurement.
That's why wider spans reduce fractional error: a half-line misjudgment at 100 µm barely moves the result, while the same misjudgment at 20 µm can shift your factor by several percent.
Round your final factor to one decimal place in most routine lab work. Standard light microscopes have a practical resolution limit around 0.2 µm, so reporting a factor to three or four decimal places implies precision your optics can't actually deliver.
Why Do My Measurements Keep Coming Out Different?
Inconsistent readings across fields of view, calibration values that shift each time you redo the procedure, or specimen sizes that look wildly off from published references all point to the same root problem: something changed in your optical path since the last calibration.
Start troubleshooting with focus. If your microscope isn't parfocal, or you're not fully focused on both scales, your coincidence points will drift. Check that the reticle and stage micrometer scales are truly parallel, not just close, and always choose the largest span the field allows rather than settling for the first coincidence you spot.
Common error sources include a changed tube length, a swapped or worn objective, dirt sitting directly on either scale, and a stage that isn't sitting flat. Any of these can quietly shift your factor without an obvious visual cue.
- Re-clean both the reticle and stage micrometer scale before assuming a mechanical fault.
- Re-calibrate immediately after changing any objective, eyepiece, or intermediate optical element.
- Re-check that the stage sits level, since even slight tilt changes the effective magnification across the field.
Pro Tip: Keep a spare, verified stage micrometer stored separately from your daily-use slide. If your calibration numbers suddenly look wrong, swapping in the spare tells you within minutes whether the problem is your scale or your microscope.
Recording and Applying Your Calibration Values
A calibration factor is only useful if you can find it again later, correctly matched to the exact objective and instrument it belongs to. Lab guidance recommends recording enough detail that nobody in your lab accidentally applies a 40x factor to a 10x measurement.
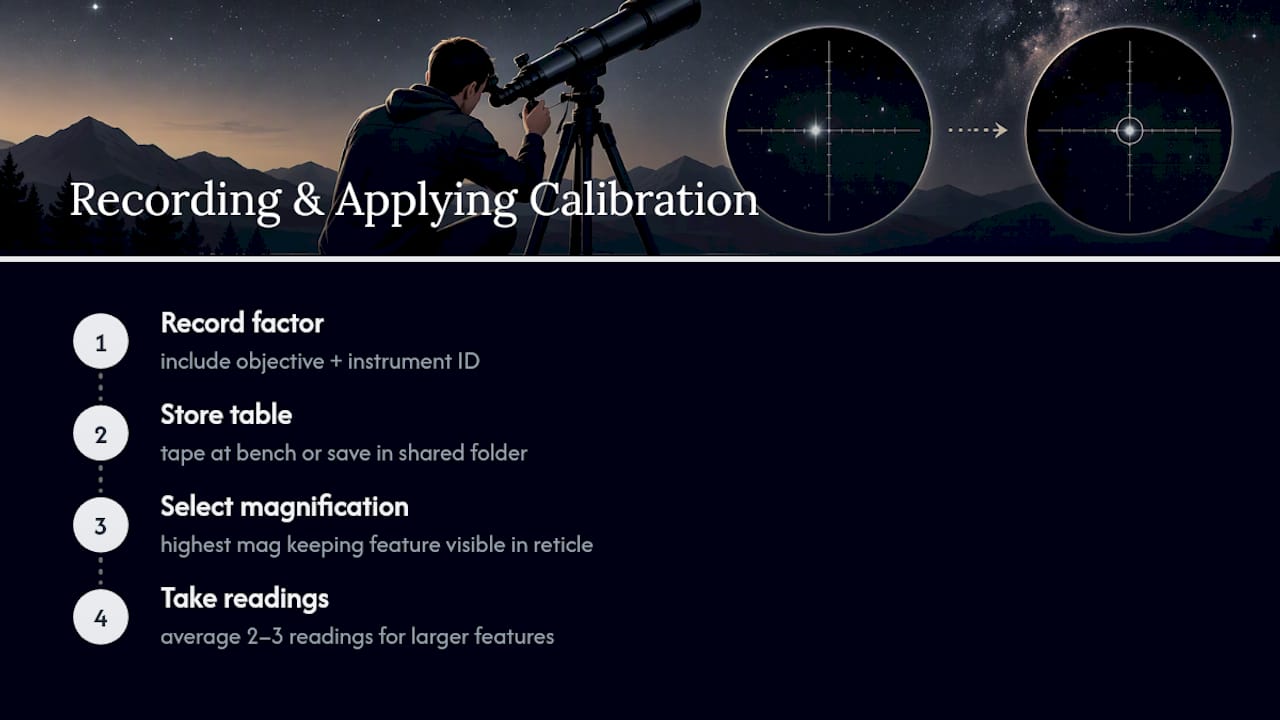
Keep this table taped near the workstation or saved in a shared lab folder, not buried in a personal notebook that walks out the door with one student. For routine specimen measurement, pick the highest magnification that still keeps your feature of interest inside the reticle's visible span, and average two or three readings when measuring anything larger than a few divisions wide.
Wevision Resources for Accurate Reticle Measurement
Wevision's product pages include setup videos and manuals that walk through eyepiece installation and stage handling step by step, which matters because a wobbly stage or a loose eyepiece undoes careful calibration work fast. A stable mechanical stage and consistent illumination reduce the field-to-field drift that makes reticle calibration frustrating in the first place, so the hardware you're calibrating on matters almost as much as the procedure itself.
Why Routine Calibration Is Worth the Bench Time
Calibration is a five-minute habit that prevents hours of second-guessing your data later. Build it into your lab's standard checks, not just your first day with a new microscope, and you'll trust every measurement that follows.
— Oliver
Wevision: A Steadier Starting Point for Calibration
Reticle calibration gets harder when the hardware fights you: a stage that shifts mid-reading, illumination that flickers between sessions, or optics that blur at the edges of the field. Wevision builds premium microscopes around stable mechanical stages and consistent glass optics specifically so your two coincidence points stay put while you count divisions.
Instructional videos often walk through eyepiece installation, stage alignment, and illumination setup before you ever touch a stage micrometer. That groundwork makes the calibration steps above go faster and produce more repeatable numbers. Browse the compound microscope lineup to see which model fits your classroom or lab, and use the setup videos to get your first calibration table filled in the same day your microscope arrives.
Sources
For procedure detail and lab standards, see the CDC ocular micrometer job aid, the Nikon MicroscopyU tutorial, and the Graticules Optics stage micrometer guide.
- Calibration of the ocular micrometer (CDC job aid - PDF)
- Eyepiece reticle calibration (MicroscopyU / Nikon tutorial)
FAQ
What Are Common Symptoms of Poor Calibration?
Measurements that shift from field to field, a calibration factor that changes each time you redo the procedure, and specimen sizes that look far too large or small compared to known references all signal a calibration problem. Usually the cause is a focus mismatch, a non-parallel scale alignment, or dirt sitting on one of the scales.
What Does "1 Div = 0.01 mm" Mean on a Stage Micrometer?
It means each division etched on the stage micrometer scale equals 10 micrometers of actual physical distance. That known, fixed value is what you compare against your reticle's divisions to calculate your µm-per-division factor.
How Do I Calibrate an Eyepiece Micrometer?
You align the eyepiece reticle with a stage micrometer, find two exact coincidence points across the widest practical span, then divide the known stage distance by the number of reticle divisions between those points. Repeat this separately for every objective and every microscope, since the factor changes with magnification and optical configuration.
What Is the Five-Point Calibration Method?
There isn't a single standardized "five-point" calibration method widely documented for eyepiece reticles; definitions of multi-point calibration vary by lab and instrument type. The two-coincidence method described in this guide, using the widest available span, is the standard approach recommended for stage micrometer calibration.
Does Wevision Sell Microscopes Suited for Reticle Calibration Work?
Yes, Wevision's compound microscopes are built with stable mechanical stages and consistent optics that help reduce the field drift that complicates calibration. Current pricing and specifications are available directly on the Wevision website.