

A blood smear is a thin layer of blood spread on a glass slide to evaluate red cells, white cells, platelets, and parasites under magnification. The correct workflow is simple: scan the whole slide at low power (10x or 20x) to check quality and spot obvious abnormalities, then move to 100x oil immersion to study cell morphology in detail. You'll learn how to prepare, stain, and read a smear so what you see under the lens actually matches what's happening in the blood.
TL;DR:
- Blood smears reveal cell morphology details that automated analyzers often miss, especially in ambiguous or abnormal cases.
- Proper specimen collection, handling, and smear technique are crucial for accurate interpretation, with immediate processing within two hours of collection.
- A systematic microscope workflow from low magnification to oil immersion at 100x is essential to identify abnormalities reliably without missing subtle findings.
- Recognizing smear artifacts such as echinocytes, rouleaux, or distortion is vital to avoid misdiagnosing conditions like disease or artifact.
- Manual review remains indispensable in diagnosing blood disorders, and consistent technique combined with reference tools enhances accuracy and confidence.
Table of Contents
- When and Why to Do a Blood Smear
- Specimen Collection and Handling Before You Smear
- How to Make a Thin and Thick Blood Smear
- Fixing and Staining Your Blood Smear
- Microscope Setup and Stepwise Viewing Workflow
- Interpreting Common Findings on a Blood Smear
- Artifacts and Troubleshooting Common Smear Problems
- Wevision Resources and What to Look for in a Hematology Microscope
- Why Manual Smear Skills Still Matter in an Automated Lab
- Finding the Right Microscope for Smear Work
- Sources
- FAQ
When and Why to Do a Blood Smear
A complete blood count from an automated analyzer gives you numbers. A smear tells you why those numbers look the way they do. When a CBC flags an abnormal result, unexplained anemia, or a platelet count that doesn't match the clinical picture, a manual smear review answers questions the machine can't.
Common indications include:
- Flagged CBC results, such as an unusually low platelet count or an abnormal white cell differential
- Suspected parasitic infection, including malaria or Babesia
- Unexplained anemia where red cell shape or size needs direct visual confirmation
- Verification of platelet counts to rule out clumping artifacts
- Suspicion of blast cells or other findings suggesting a hematologic malignancy
Laboratories typically use tiered review criteria: a quick smear scan to confirm analyzer output, a full manual differential when counts fall outside expected ranges, and a deeper smear review when morphology looks unusual. This tiered approach is described in detail in a PMC review on smear scan and review criteria, which outlines when each level of scrutiny is warranted.
A smear has real limits, though. It can show you that red cells look fragmented or that a lymphocyte looks atypical, but it can't give you a definitive diagnosis on its own. Confirming leukemia, for instance, usually requires flow cytometry, bone marrow biopsy, or molecular testing on top of what you see under the microscope. Manual review remains essential precisely because a peripheral blood smear reveals morphologic detail that automated analyzers miss, but when findings are ambiguous or concerning, refer the slide to a hematopathologist rather than stretching your interpretation past what the smear can reliably tell you.
Specimen Collection and Handling Before You Smear
Good technique on the slide can't fix a bad draw. Everything starts with how the blood is collected and how quickly you get it onto glass.
- Draw blood into a tube containing EDTA anticoagulant. EDTA preserves cell shape better than other anticoagulants and prevents clotting without distorting morphology.
- Invert the tube gently eight to ten times immediately after the draw. Don't shake it. Vigorous agitation causes hemolysis and can rupture fragile white cells.
- Prepare the smear within about two hours of collection at room temperature. Morphology degrades the longer blood sits, and red cells begin to develop crenation and other storage artifacts.
- If you can't smear within that window, refrigerate the sample, but treat refrigeration as a stopgap rather than a substitute for prompt processing. Extended storage, even chilled, still risks morphologic drift over time, a point echoed in clinical guidance on specimen timing for light microscopy.
- Label the tube and slide clearly before you start, and check the sample visually for small clots. A clotted specimen will produce a streaky, uneven smear no matter how careful your technique is, so catching this early saves you a wasted slide.
Mix the tube one more time right before you pull your drop. Cells settle fast, and a sample that sat still for even a few minutes will smear unevenly if you don't remix it.
How to Make a Thin and Thick Blood Smear
Making a diagnostic-quality smear is a skill you build through repetition, but the mechanics are straightforward once you understand the geometry involved.
For a thin smear:
- Place a small drop of blood, about the size of a pinhead, near one end of a clean glass slide.
- Hold a second slide (the spreader) at roughly a 30 to 45 degree angle against the first, just in front of the drop.
- Draw the spreader back into the drop and let the blood spread along its edge by capillary action.
- Push the spreader forward in one smooth, continuous motion. A steeper angle or faster push makes a thicker smear; a shallower angle or slower push makes a thinner one.
- Air-dry the slide immediately by waving it gently. Don't blow on it. Moisture from your breath introduces artifacts.
The goal is a monolayer, a region where red cells sit side by side in a single layer without overlapping, like a handful of coins spread flat on a table rather than stacked. This zone sits just before the feathered edge, the very thin trailing region where the smear thins to nothing. Resist the temptation to read morphology from that feathered edge. Cells there get stretched and distorted by surface tension as the smear dries, and that distortion can look like pathology when it's really just physics. Selecting the correct reading area matters more than most beginners realize, since misreading the feathered edge or the thick zone is one of the more common sources of error in smear interpretation.
For a thick smear, used mainly for parasite detection, spread a larger drop of blood in a small circular area without a spreader slide, then let it dry slowly and completely (this can take several hours) before staining. Thick smears concentrate parasites like malaria into a smaller viewing area, which improves detection sensitivity even though the technique sacrifices red cell morphology detail.
Pro Tip: Make two or three smears from the same draw whenever you have enough sample. Slides break, stains fail, and having a backup saves you from redrawing blood or losing the diagnostic window entirely.
Handle every slide as a biohazard. Wear gloves throughout, and dispose of used slides and lancets in a sharps container, not the regular trash.
Fixing and Staining Your Blood Smear
Staining is what turns a clear film of blood into something your eye can actually interpret. Without it, red cells, white cells, and platelets are nearly impossible to distinguish under bright field illumination.
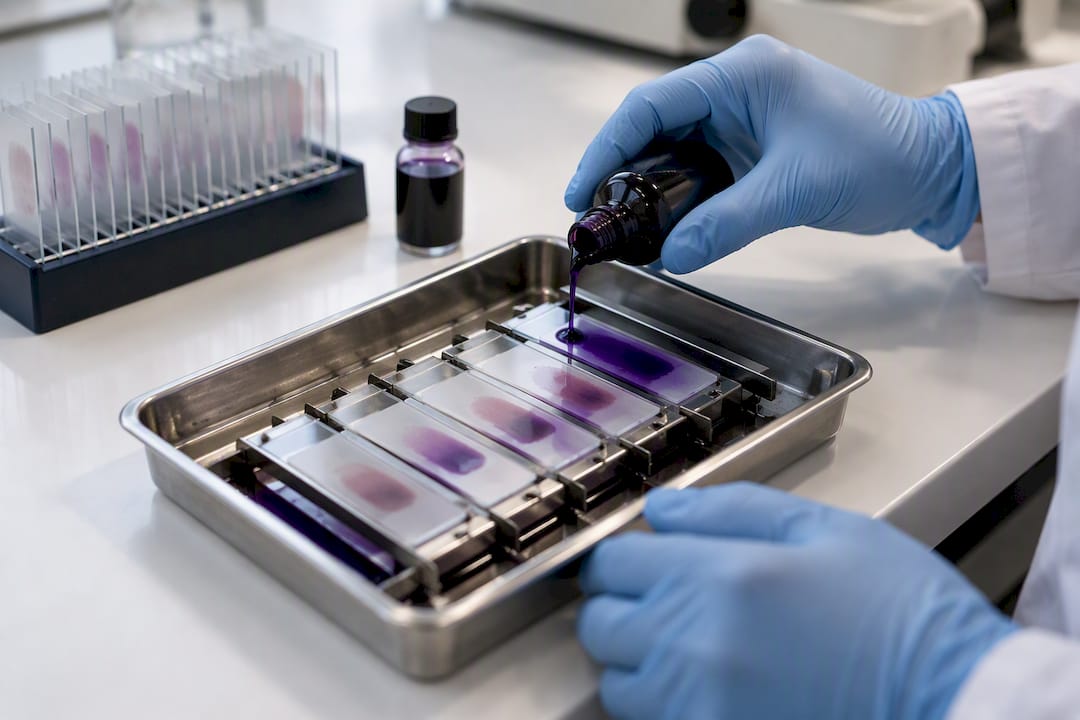
Romanowsky-type stains are the standard choice for routine peripheral smear work. Wright stain, Giemsa stain, and the combined Wright-Giemsa stain are the three you'll encounter most often in a clinical or teaching lab, and each highlights blood cell components slightly differently, Giemsa in particular is prized for showing parasite structures like malaria trophozoites with unusual clarity, which is why many parasitology labs prefer it over plain Wright stain.
Fix the slide within about an hour of preparation, and make sure it's fully air-dried before you fix it. A damp slide won't fix properly and will show ragged, unreliable staining. Staining itself follows one of two general methods:
- Dip staining, where the slide passes through a sequence of fixative, stain, and buffer baths, common in high-volume labs
- Flooding, or manual staining, where you apply stain directly to the slide with a dropper, more common in teaching settings and small labs
Watch for staining errors, because they're common and they matter. Over-staining leaves cells too dark and blue, obscuring detail. Under-staining leaves everything pale and washed out, making it hard to distinguish cell types. Buffer pH is often the hidden culprit: too acidic and red cells take on an orange or red cast; too alkaline and everything turns overly blue. If a slide looks off, don't try to interpret it. Remake it. A five-minute redo beats a misread result.
Microscope Setup and Stepwise Viewing Workflow
Reading a smear correctly depends as much on your microscope routine as on the slide itself. The workflow that clinical guidelines recommend, and the one worth building as a habit, moves from low magnification to high in a fixed sequence.
Start at 10x or 20x objective power to scan the entire slide. At this stage you're checking overall smear quality, looking for platelet clumps, fibrin strands, rouleaux formation, and any large extracellular organisms like microfilariae that would be easy to miss at higher power. Skipping this step and jumping straight to oil immersion is one of the most common mistakes beginners make, since low-density findings such as parasites or platelet aggregates are easy to miss if you don't scan broadly first.
Move to 40x or 50x for a closer look at areas that caught your attention during the scan. Then switch to 100x with oil immersion for the detailed work: red cell morphology, white cell differential counts, and platelet estimates. This is where you'll spend most of your analytical time.
A few practical setup notes make a real difference in image quality:
- Adjust the condenser height and iris diaphragm to control contrast; too much light washes out subtle color differences in stained cells
- A simplified Koehler alignment (centering and focusing the condenser before each session) improves resolution more than most people expect
- Clean the oil objective after each use to prevent dried oil residue from degrading image clarity on the next slide
On field-count standards, guidance from the CDC recommends examining at least 300 fields at 100x for certain parasite detection analyses, since low parasite density can otherwise go undetected. For a routine white cell differential, count 100 cells in the monolayer region and classify each by type.
Pro Tip: Keep a consistent scanning pattern, such as a systematic zigzag across the slide, every time you examine a smear. Random scanning increases the odds you'll skip a field that mattered.
Interpreting Common Findings on a Blood Smear
This is where the smear earns its diagnostic value. Once you're in the monolayer at 100x, you're looking for patterns across four categories: red cells, white cells, platelets, and anything that shouldn't be there at all.
Red cell morphology tells a story about how cells are being made or destroyed. Schistocytes, fragmented cells with jagged edges, suggest mechanical damage from conditions like disseminated intravascular coagulation or hemolytic anemia. Spherocytes, round cells that lack the normal central pallor, point toward hereditary spherocytosis or autoimmune hemolysis. Target cells, with a bullseye appearance, show up in liver disease and certain hemoglobinopathies. Teardrop cells often indicate bone marrow fibrosis or infiltration.
White cell patterns matter just as much. A left shift, an increase in immature neutrophil forms, usually signals an active bacterial infection. Blast cells, large immature cells with minimal cytoplasm, raise immediate concern for leukemia and warrant urgent referral. Toxic granulation and Dohle bodies in neutrophils suggest severe infection or inflammation. Atypical lymphocytes with abundant cytoplasm are classically associated with viral infections like mononucleosis.
Platelets deserve their own careful look, separate from what the automated analyzer reports. Estimate platelet numbers per field and compare against the machine's count. If you see platelet clumping, especially near the edges of the smear, treat any low automated platelet count with suspicion. This is a well-documented cause of false alarms, since a careful smear review can confirm true thrombocytopenia versus clumping artifact that would otherwise trigger unnecessary concern. Giant platelets, larger than a normal red cell, can indicate a bone marrow disorder.
Parasites and extracellular organisms require a trained eye and good stain quality. Malaria parasites appear as ring forms or trophozoites inside red cells. Babesia looks similar but often shows characteristic tetrad forms. Microfilariae are large, visible even at lower power, and move in a distinctive sheathed pattern in thick smears.
| Finding | Typical Appearance | Common Association |
|---|---|---|
| Schistocytes | Fragmented, jagged-edged red cells | Hemolytic anemia, DIC |
| Spherocytes | Round cells, no central pallor | Hereditary spherocytosis, autoimmune hemolysis |
| Target cells | Bullseye pattern | Liver disease, hemoglobinopathies |
| Blasts | Large immature cells, scant cytoplasm | Leukemia (requires urgent referral) |
| Giant platelets | Larger than normal red cells | Bone marrow disorders |
| Malaria ring forms | Ring-shaped parasites inside red cells | Malaria infection |
Artifacts and Troubleshooting Common Smear Problems
Not everything unusual on a slide is pathology. Artifact recognition is a skill in itself, and confusing artifact with disease is one of the most common errors new microscopists make.
- Echinocytes, red cells with small, evenly spaced spikes, often result from drying too slowly or from a hypertonic stain solution rather than true disease
- Stomatocytes, cells with a slit-like central pallor, can appear from pH imbalance in the stain rather than a genuine cell defect
- Distortion at the feathered edge mimics abnormal cell shapes but reflects smear technique, not the patient's blood
- Rouleaux formation, red cells stacked like coins, can appear from a slow smear or genuinely elevated protein levels, so context matters
If a smear comes out too thick or too thin, don't try to salvage it. Remake the slide. Adjust the spreader angle: a shallower angle and slower push thin out an overly thick smear, while a steeper angle and faster push thicken one that's too sparse. Adjusting drop size helps too. A larger drop with the same technique produces a thicker film.
When platelet clumping is suspected on a low automated count, the smear itself often resolves the question, echoing the same verification role a PMC review describes for platelet clump detection. If clumping is confirmed and the clinical picture doesn't fit, consider a repeat draw or a different anticoagulant to rule out an EDTA-dependent clumping artifact, which some patients show consistently.
Pro Tip: Keep a small folder of reference images, both normal morphology and known artifacts, next to your workstation. Comparing what you see against a known example is faster and more reliable than trying to remember it.
Wevision Resources and What to Look for in a Hematology Microscope
Learning to read a smear well takes repetition, and having the right tools removes one variable from the equation. There are video demonstrations available covering slide setup, focus technique, and objective changes, along with written setup guides and product manuals for various microscope models. Responsive email support can assist if you encounter difficulties mid-session.
This article was written with input from Oliver, who covers microscopy technique and lab equipment for Wevision.
For blood smear work specifically, look for these features when choosing a microscope:
- A 100x oil immersion objective, non-negotiable for red cell morphology and parasite identification
- A mechanical stage with fine X-Y control, which makes systematic field scanning far more precise than nudging a slide by hand
- Adjustable condenser and iris diaphragm for controlling contrast and light intensity
- A smartphone adapter, useful for photographing notable findings for teaching, records, or peer consultation
Why Manual Smear Skills Still Matter in an Automated Lab
Automated analyzers are fast and consistent, but they flag abnormalities. They don't explain them. That distinction is why manual smear review hasn't disappeared even as hematology technology has improved, and it's unlikely to disappear soon, because morphology detail that automated systems miss often changes clinical decisions.
Building real skill here takes repetition, not luck. Scan every slide the same way, every time. Compare your reads against a colleague's on the same slide whenever possible. Keep reference photomicrographs on hand for the findings you see rarely, since infrequent exposure is exactly when misidentification happens.
One last reminder: treat every slide as a biohazard until proven otherwise. Gloves, proper sharps disposal, and careful handling aren't optional steps you skip when you're in a hurry.
— Oliver
Finding the Right Microscope for Smear Work
A smear is only as good as the microscope you're reading it under.

Where this company stands apart is the support that comes with instrument purchase. Video demonstrations walk you through focusing at oil immersion, adjusting the condenser, and mounting a smartphone adapter to photograph a finding worth saving. For students or lab techs setting up a microscope for the first time, such guidance may shorten the learning curve, and responsive email support can assist if something doesn't click.
Browse the compound microscopes built for lab and classroom use to compare models suited to smear work, or visit the Wevision product hub for setup guides and demo videos before you buy. If you already own one and hit a snag mid-session, reach out to support and get unstuck the same day.
Sources
The technique and standards in this guide draw on clinical and public health sources used by laboratories and educators worldwide:
- CDC — Diagnostic Procedures: Blood microexamination
- Peripheral Blood Smear — NCBI Bookshelf
- Purpose and Criteria for Blood Smear Scan, Examination, and Review — PMC
This article is general information, not a substitute for advice from a qualified doctor. Consult a qualified healthcare professional about your own circumstances before acting on anything here.
FAQ
How Do You View a Blood Smear Under a Microscope?
Standards from the CDC recommend examining at least 300 fields at 100x for certain parasite detection tasks.
What Diseases Can a Blood Smear Detect?
A smear can reveal signs of anemia, infection, parasites like malaria and Babesia, and abnormal cell types associated with leukemia, though a definitive diagnosis usually requires additional testing. It's particularly valuable for spotting morphology changes that automated analyzers miss.
What Microscope Is Used for Blood Smears?
Some compound microscopes on the market include these features along with adjustable illumination suited to viewing stained cells clearly.
Can You Have Smudge Cells and Not Have Leukemia?
Yes. Smudge cells, fragile white cells that rupture during smear preparation, appear more often in chronic lymphocytic leukemia but can also show up from rough handling or excessive spreading pressure during smear technique. A smear finding like this should be interpreted alongside the full clinical picture, not in isolation, and referred for further workup if the pattern is persistent or unexplained.